This Will Make Your 16th Note Strums Sound Tight and Professional
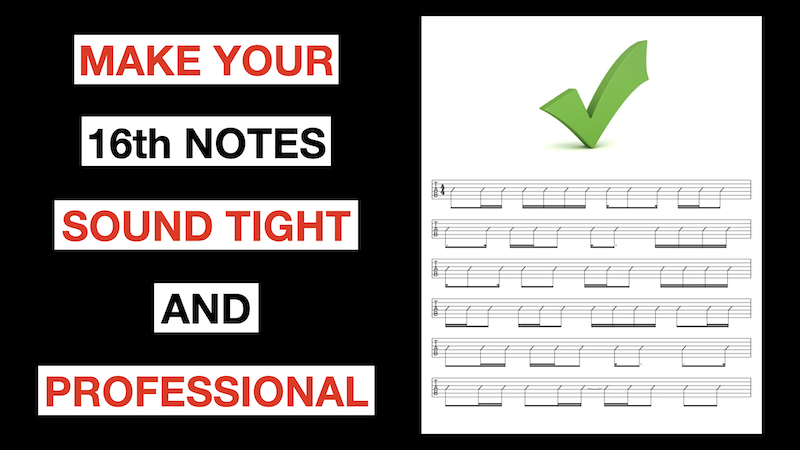
This Will Make Your 16th Note Strums Sound Tight and Professional
Struggling to lock in your 16th-note strums --- or just want them to feel tighter and more controlled? You're not alone. 16th notes are one of those things every guitarist thinks they understand... until the timing starts to drift or the groove just doesn't quite land.
The technique you'll learn below fixes that. It works whether you're still figuring out how to feel 16th notes or you've been playing them for years and want to make them cleaner, sharper, and more professional.
This approach isn't just for funk players either --- you'll find it in rock, pop, country, metal, and just about every other style of guitar playing. The key is learning how to control your hand motion, understand the subdivision, and know exactly where each stroke fits in the beat.
The best part? It's simple, fun to practice, and you'll start hearing the difference almost immediately.
Step 1: Understanding the Motion and the Count
We'll be working in 16th-note rhythm. Traditionally, that's counted in Western notation as:
1 e & a 2 e & a 3 e & a 4 e & a
But I prefer the Konnakol method --- a percussive Indian rhythm system that makes the feel much clearer. Instead of numbers, we say:
Ta-Ka-Di-Mi Ta-Ka-Di-Mi Ta-Ka-Di-Mi Ta-Ka-Di-Mi
Each syllable matches a specific strumming motion:
Ta -- Down
Ka -- Up
Di -- Down
Mi -- Up
When you combine these, you're creating the constant motion of 16th-note strumming --- even if you're not playing a note on every stroke.
To start, rest your fretting hand lightly on the strings (no pressure) so you get a muted sound. Practice strumming Ta-Ka-Di-Mi evenly while tapping your foot on each downbeat.
That muted feel is your foundation --- it keeps your hand relaxed and your rhythm consistent.

Step 2: Adding a Chord
Now let's add some sound.
We'll start with a D9-style chord --- just a small, funky voicing that works well for this exercise. You can play it either:
With your third finger across the 5th fret of the top three strings and your first finger on the 4th fret, or
Simply bar one finger across the top three strings.
Both options work great and produce that classic D9 sound.
Start by playing only on the "Ta" beats while keeping the rest muted:
Ta-Ka-Di-Mi, Ta-Ka-Di-Mi, Ta-Ka-Di-Mi
This helps you feel the downbeat clearly.

Step 3: Targeting Each Subdivision
Next, we'll shift focus to the Di, the second downstroke (or "&" in Western counting). Then we'll move to the Ka (the first upstroke), and finally the Mi (the last upstroke).
For each, the process is simple:
Keep your hand moving constantly in 16ths.
Only strike the string on the chosen syllable.
Stay relaxed, and lift your fingers immediately after the note to keep it percussive.
By isolating each subdivision, you're training your ear and hand to recognize every possible rhythmic placement --- the key skill behind precise 16th-note playing.
Targeting the Di

Targeting the Ka

Targeting The Me

Step 4: Combining Subdivisions into Patterns
Once you can cleanly target each syllable, it's time to combine them into short rhythmic phrases.
Example 1: Play on "Ta" and "Mi" (the first and last 16th of each beat).
In Western counting, that's 1 and a. Everything else stays muted.
It sounds like: Ta-Ka-Di-Mi, Ta-Ka-Di-Mi, Ta-Ka-Di-Mi, Ta-Ka-Di-Mi

Example 2: Change the chord voicing. Use a G root position triad on strings 2-3-4:
1st finger -- 3rd fret, 2nd string
2nd finger -- 4th fret, 3rd string
3rd finger -- 5th fret, 4th string
This time, play the "Ta" on beats 1, 2, and 4 --- and the "Ka" on beat 3.
It creates a syncopated groove that's instantly musical and fun to play.

Step 5: Understanding the Concept
What we've covered so far is just the beginning.
The first five examples are your foundation --- the building blocks of 16th-note mastery. The last two show how to apply the same ideas to real rhythmic patterns --- the kind you hear in actual songs.
This method forces you to count, to listen, and to control your timing. Once you do, you'll start hearing this feel in every style of music you play.
Step 6: Seeing It Everywhere
You'll find this rhythmic concept across all genres.
In funk and soul, it's the driving, percussive groove.
In rock, you'll hear it in songs like Smells Like Teen Spirit and More Than a Feeling.
The difference is just how each style uses space and accents. Rock often leaves gaps; funk fills them with muted hits --- but the rhythmic engine underneath is the same.
Want to Master Rhythm for Good?
If you're ready to take the next step, check out my free video guide:
"6 Easy Steps to Learn and Play Any Rhythm with Perfect Timing."
In the guide, I'll walk you through each step of the process and show you exactly how to practice rhythm to make realprogress --- so your timing, confidence, and groove all lock in for good.
Free Video:
Six Easy Steps to Learn and Play Any Rhythm with Perfect Timing