Unlock Your Creativity: Transform One Rhythm into Endless Guitar Parts

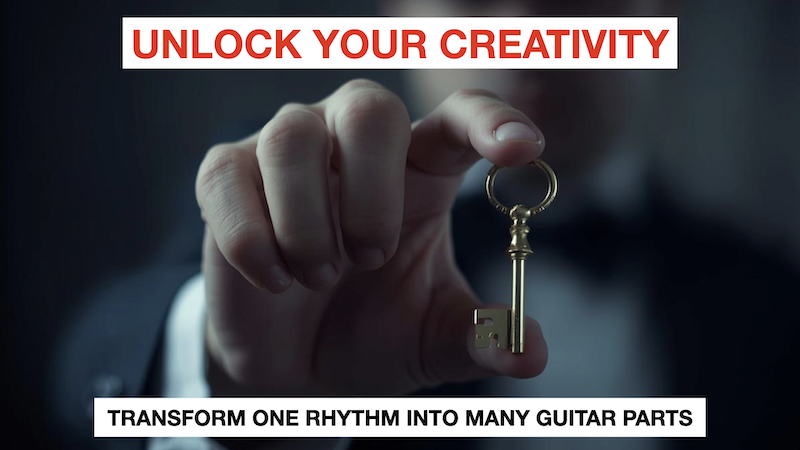
What if mastering rhythm could unlock a whole new world of creativity in your guitar playing?
In this engaging discussion, Simon and Brian explore a game-changing approach to rhythm that turns it into a versatile tool for crafting everything from strumming patterns to intricate solos.
Whether you're a beginner or a seasoned player, this method offers endless possibilities to enhance your playing, spark your creativity, and make your music stand out.
Watch the video to see how one simple rhythm can transform into countless musical ideas---and learn why rhythm is the foundation of truly expressive guitar playing.
Video Transcript
Simon
What about number four? What have you got for number four for building, developing, and improving your rhythm?
Brian
I like to have my students use rhythm as a creative tool. This approach is the exact opposite of what we just talked about.
For this exercise, you take one rhythm and create at least three different things from it. Idea one can be as simple as strumming first-position chords. From there, you could play inversions at three different spots on the neck. Make sure you keep the same rhythm.
Next, you could create an arpeggiated part. I know you do a lot of finger-picking stuff, so you could do that for the chord patterns, too. The rhythm for every example has to stay the same.
You could also do a single-note lead line using this exact same rhythm. How far can you take this idea of this single rhythm, and how many different options can I get out of it before I entirely run out of ideas?
Simon
So, could you give us an example of that? Can you create a bar rhythm? I guess you wouldn't want it to be much longer than that, at least at the beginning. But could you give us an example of a rhythm and maybe three ways to apply it?
Brian
Sure. Let's take the most basic pop progression and the most used strum ever. So let's do an I V vi IV in the key of G ( G | D | Em | C )
Let's start with first-position chords.

Now, with bar chords using the same rhythm.

Now, if you know your inversions, you can use one inversion shape and move it around the neck or make it more complicated by voice leading like this.

Let's take that same rhythm and arpeggiate this progression.

I don't want to use the same rhythm for the lead line the whole time. I'll do it on the first and third chords.

This lead is not going to wow the other guitar players in the room, but a lot of times, that's not what fits the song anyway. But we did the exercise because I took one rhythm and created many things from it. I used things I know I will use and play all the time.
Simon
That's really good because, as you said, you start with rhythm, right? Rhythm is the central thing. That's really good. So, is that how you would typically teach somebody early on, with rhythm?
Brian
Very early on, step one is: can I play the rhythm? Can I count it, clap it, and play it with one note or chord? After that, I have students start doing exercises like this. It would be best to start with techniques and progressions in the music you like playing. This idea works for any style of music. So, if you like hard rock music, you can use the same rhythm and progression but play power chords like this.

It still sounds good and is usable.
The main idea is to take whatever you use in your style of music and apply it. Then, keep expanding and expanding the options that you have. This allows you to improvise when you're playing with other people. All you have to do is keep the rhythm steady, and now you have different options you can throw in there that give the song a new flavor.
Simon
I believe the rhythm you applied with the single-note line was effective; your choice not to play over every chord enhances the sound. This approach helps the player recognize how to structure their phrases with a clear beginning and end. After all, guitarists are known for their continuous playing, often to excess. While we can breathe and play simultaneously, frequently resulting in a constant barrage of notes, it doesn't always produce the best sound.
By playing the rhythm and allowing it to breathe for a bar, as you demonstrated, you learn to create space. Then, repeating the rhythm helps reinforce it in another context to complement the chord. This exercise also offers additional advantages for soloing and improvisation.
Brian
Absolutely, this approach fosters a conversation. It avoids run-on sentences. Guitar players often excel at creating lengthy paragraphs that seem endless. When will that period or pause finally arrive? In many instances, it might take quite some time.
Simon
They've got a lot to say.
______________________________________________________________________
The ability to create variations from any rhythm is a skill every guitar player needs to develop. If you struggle to create your own strums, riffs, or lead lines, I highly recommend "The Guide to Making Any Rhythm You Know Sound Even Better". This straightforward guide will not only assist you in fully utilizing the potential of any rhythm but will also help you unleash your creativity. Click the link below this video to grab your copy today.
Your Chords Sound SLOPPY Because You're Not Doing THIS [Guitar Technique]
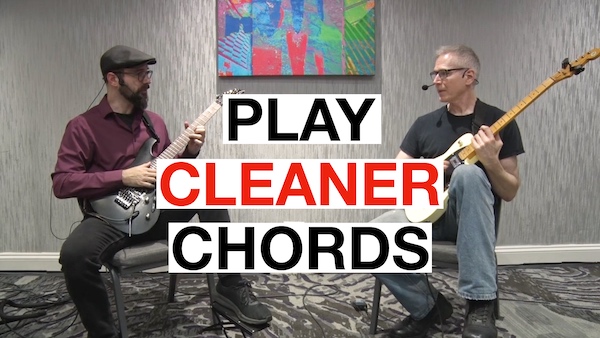
Do you find that when you're playing guitar, there are constantly extra strings ringing out?
And no matter how hard you try, even when it seems like you're being as surgically precise as a NASA engineer performing open-heart surgery on a hummingbird, there are still other strings ringing?
Well, I hate to be the bearer of bad news here, but the strings on your guitar are going to ring unless you are actively muting them.
No amount of picking accuracy is going to solve this problem, because strings will start ringing for more reasons than just hitting them with the pick.
- They can start ringing sympathetically, meaning a certain note will cause a completely unrelated string to vibrate like it just heard the juiciest piece of gossip.
- They can ring because your elbow bumped the guitar,
- or because someone in the next room sneezed,
- or because Mercury is in retrograde,
- or because they still haven't forgiven you for what happened in 2002,
- or because a dog barked three streets away and your G string took that personally,
- or simply because that's just what they feel like doing in that particular moment.
The point is, your strings are going to ring. It's their whole personality.
(If guitar strings had a dating profile, under hobbies it would just say "ringing when unwanted" and "ruining your recordings.")
So unless you take some initiative and put a stop to it, they're going to keep doing it!
Now, typically when people think about muting their guitar strings, they'll think of palm muting. Well, what if you want to be strumming? What if the strings ringing out are on the other side of the guitar from your palm (i.e. the higher strings...), laughing at you from a safe distance?
All of these issues create the need for another type of muting you probably aren't doing, which is left hand muting.
(Or right hand muting if you're left handed... mh... Fretting hand muting. Muting with your fretting hand. Look, we're going to be here all day if we keep accommodating every possible hand configuration. Fretting hand. Final answer.)
"But I thought my fretting hand was for fretting! How am I to mute the strings with the same hand I fret the notes? What's next, breakfast for dinner? Dogs living with cats? Using a fork as a backscratcher? Actually, that last one works great, but STILL."
That's right, your left hand fretting hand actually has two jobs.
(It's the unpaid intern of your guitar technique — expected to do everything, trained for none of it, and somehow still the only reason the whole operation doesn't fall apart. Meanwhile, the picking hand just shows up, does one thing, and takes all the credit. Classic.)
While this may seem impossible, it's actually easier than you think. In the video below, I'll explain how to get started on left hand muting muting with your fretting hand.
If you have never ever had this problem before with the chords you're playing, it's probably because you haven't learned any chords that are interesting enough to present the problem! If you want to learn some fancy new chords, and develop a much better understanding of how chords and harmony function on the guitar in general, check out my Complete Chord Mastery guitar course!
Video Transcription
Hello Internet, so nice to see you! Often when we play complex chords on the guitar, we have situations where we have to play some strings and not play some other strings. And people, my students always ask me, how do I strum chords where I have some strings that should ring and some strings that shouldn't ring?
Well, the first thing will be, maybe don't strum them. Okay, maybe pick the individual strings, but sometimes you have to strum them. That's what we do. So a student asked me that, and we went down in detail, in real deep detail, on how to deal with those situations on the guitar.
If you have any problem playing your chords cleanly, you want to watch this lesson. So let's go. It's specifically on strings 3, 4, and 5. When I strum, mainly I'll get the low E string going. Yes. And it's stronger than the mute that I put on it with my fingertip.
And this is only when I use a pick. Like if I... Like. See. 513, 135, 351, 513. And that would be the, you know, the song. So if I could play that and just like string that 5-1-3. So here's how you proceed.
If you were on the high string, I would tell you to use the thumb to touch the sixth string. But now you are up by here, in the thumb. I mean, it's possible that it kind of restricts the movement a lot at this point.
Yes. Get doable, but uncomfortable. Instead, I say this. First, relax your hand. You're going to need it. Then, whatever triad you play, you're going to have at least one finger free. It's going to happen all the time because you have only three notes.
And you have four fingers. So in this case, you have the middle finger free, right? Yes. Touch the sixth string with the middle finger. And the index finger can touch string one and two. Good. Now stay there.
Just relax your finger by the movement. Once they're relaxed, play the F sharp minor. Now you have a ring finger free. Just relax that finger and put it there. Press the other three. You have to pay attention to not press with that finger and just relaxing and touching the other strings.
It's a bit awkward at first. Then you relax the fingers, go in the next position where you have E minor. You have the ring finger and the pinky finger free. And you stop the first two with the index finger.
How I see. If it's awkward, you can always do this. But yeah, those three strings playing and those two muted. Yeah, I'm getting. I'm accidentally pressing down. Yeah, in that case, move the index finger slightly higher.
Yeah, because I'm borrowing these two strings, my index fingers. Yeah, again, if you're borrowing and it's not, and you're hitting this, then move it a bit higher. Higher in this direction. Oh, I see.
Oh, I see. Yes. Until you get the right moment where you're muting. And then put back the middle finger. Yeah. Make sense? Yes. Yes. Again, it's a bit awkward at first because now you're working with micro variables.
It's not just fretting that note with that finger, that position, etc. It's also position the finger exactly inside that. Oh, yes. So that takes a little bit, but if you practice this way, and again very slowly at first, it becomes second nature.
You would have another solution here, which would be move everything on the bottom three strings, but anyway, here. Actually here, no? Oh, that's, yeah, the E is a little bit tough. I only have 22 frets.
No, no, no, no, no, no. You don't need that. I mean, if you think of the notes you're playing here, F sharp, B, D, you find them here, at the 14th fret, F sharp, B. Then at this point it becomes a matter of sound.
Which sound do you like? It's also a matter of comfort, of course, but do you like better the sound of the thick string shorter or of the slightly thinner string longer? So you want to try both and see which one makes more sense to you?
Yes. Oh, yes. I suppose I could move it up here as well. You could, you could, but then the sound starts changing now because if you put this up up by up by here, now you have two unwound strings rather than one.
Oh, yes. And it starts to sound a bit... I mean, you can. Oh, yes. But the sound is different. Yes. Okay, so at this point, when you do those things, especially on a clean sound, the character of the string really matters.
Yes. And the mood can be very different. So at this point, you have to start thinking sonically, what do I want? But that's the technique to do it in those cases. And when you are apply here, I'll just put the bar and not bar.
And then when I do the F sharp minor, I will do this and I will put the middle finger only those two notes that I want and use the middle finger to cover low strings. It does become second nature. You need to get used to it.
But the idea is you study the position of the chord, so you fret what you want to fret, and you use the three fingers to stop all the other. Alright. So I just go through one at a time and just strategize which bit of flesh I need touching.
And again, since there are not that many shapes, your finger will get an idea and then we'll do it automatically eventually. Oh, yes. Oh, good. Yes. That's it. That's the idea. That's how you do it.
Write INCREDIBLE Chord Progressions Using The Circle of Fifths [Guitar Harmony]
Have you ever played a chord progression for someone and watched their face light up as they said: "Wow, how did you come up with that? Those chords shouldn't work together... but they do!"
No?
Me neither, for a long, loooong time. Then I made a deal with a crossroads demon Then I learned a system.
See, most guitar players are stuck in what I call "the four chord loop of doom" — playing the same progressions over and over because they don't know what else to do.
(No shame in that, by the way. We've all been there. Some of us have built a summer home there.)
There's a way out.
It involves the circle of fifths... and three "magic formulas."
Now before you run away screaming — "Tommaso, the circle of fifths sounds like something I'd need a PhD to understand!" — hear me out...
The procedure I'm about to show you is:
- Super easy to use (once you see how it works)
- Generates infinite jazzy chord progressions that all flow beautifully
- Makes people think you're some kind of harmonic wizard (you can let them believe that. I'm giving you permission)
The trick is that you don't just follow the circle of fifths mechanically — that would sound... not great.
Instead, you introduce one small change at a specific point, and suddenly everything clicks together.
I explain exactly how to do this in the video below. Fair warning: once you learn this, you may not ever write a "boring" chord progression again.
P.S. If someone asks you "how did you write that progression?" after you use this technique... you're welcome to be mysterious about it. I won't tell.
P.P.S. Remember when I said that the best way to get better at writing great chord progressions is to actually learn and study the theory to develop a complete understanding of harmony? Well luckily for you, I have compiled everything you could possibly need to know about chords and harmony, all in one Complete Chord Mastery guitar course. Check it out if you want to truly understand everything there is to know about chords and harmony on the guitar!
Video Transcription
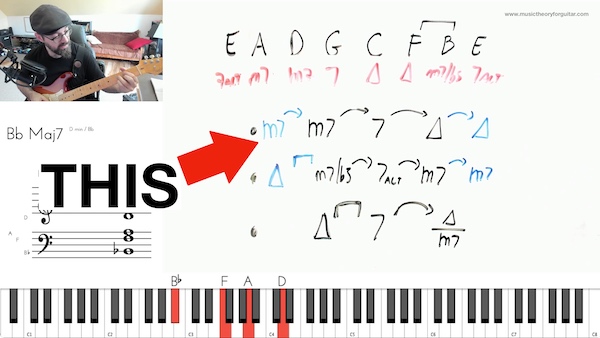
Hello Internet, so nice to see you! I'm gonna show you a procedure to write infinite jazz chord progression. They all flow beautifully, they all sound jazzy, they are all in style and the procedure is super easy to use and typically generates also the response like, how did you get that chord progression?
How did you write that chord progression? It sounds good, but those chords should not actually possibly work together, but it sounds good. So, here's how we do it. Follow me, because it takes more than one step.
Okay, we are gonna use the circle of fifth, then we're gonna use three magic formula and you need to match those formulas to the circle of fifth and everything will work out beautifully, but follow me.
The first thing to do is that we have to write the progressions of the base of all the chords. We're gonna write chord progressions of eight chords, because in most situations you want a chord progression of eight chords.
You can make it longer, you can make it shorter, but as you see this procedure is especially suited for progressions of eight chords. First thing you're gonna do is write just the bass line, okay, just the root note of the chord.
And we're gonna proceed using the circle of fifth. What we're gonna do is that we are gonna start from any note, I'm gonna start from an E, and I'm gonna go down in the circle of fifth, but I'm gonna change it at a certain point.
Because if I follow the circle of fifth exactly as it is, okay, which you can do, but not great, as you see, it will start from E, okay. And then if you go down the circle of fifth, you get an A, a D, a G, a C, an F, a B flat, an E flat, an A flat, a D flat, a G flat, which is the same as F sharp.
At this point I switch in harmonic notation, a B, even, and then again down an E. This chord progression, first of all, it's way too long for us because there would be too many chords in here. 1, 2, 3, 4, 5, 6, 7, 8, 9, 10, 11, 12, 13.
Also 13. Not a great number musically because we prefer multiples of 4. Okay, you can just go like this. So it's 12, but still not great. And also not great because it goes through too many keys. If we have to go through this, we are going very far from the beginning.
We don't want to go this far. We want to give the chord progression a sense of key, a sense of certain home feeling, rather than just going through the whole thing. So rather than going down the circle of fifth mechanically, we are going to introduce a little change.
We're going to go down the circle of fifth, and we're going to go down a perfect fifth, a perfect fifth, a perfect fifth. But at a certain point, we're gonna go down a diminished fifth rather than a perfect fifth.
Hear me out, because that's the secret of many chord progression. So for instance, I can go down, I can start from an E note again, and go down a perfect fifth, A down a perfect fifth, again, D down a perfect fifth, again, G down a perfect fifth, again, C, attention here, down a perfect fifth, F down a diminished fifth, B down a perfect fifth, E.
So when I go, when I introduce one diminished fifth, I hit the original note, 8 bar, 7 bars after, so you have a total of 8 bars, 1, 2, 3, 4, 5, 6, 7, 8. Because rather than going down a perfect fifth every time, I'm introducing a diminished fifth somewhere, and I join seamlessly with the original note, with the beginning of the chord progression.
Now, just because the note is the same doesn't mean that the chord is the same. This could be an E minor 7 or an E minor 7 5, this could be an E major 7 or an E minor 7 or anything else. So those two chords don't have to be the same, they may be, they may not be.
Point is, putting a diminished fifth does that. We can put a diminished fifth anywhere, because right now I put it here, but I could have put it after, I could have gone Bb, E, and the diminished fifth would be here, and that would be a perfect fifth.
Or I could have gone F sharp, and the diminished fifth would be here, so now there would be a different chord progression, because now I have an F sharp, not a natural F. Or I could have put a C sharp, and the diminished fifth would be here.
Or I could have put a G sharp, and the diminished fifth would be here. And so on and so forth, I could have put a D sharp here, and the diminished fifth would be here, and I could even have put an A sharp here, and a diminished fifth would be here.
The diminished fifth will be at the very beginning of the chord progression. So it can be anywhere, okay? Right now, just right now, I decide to put the diminished fifth here, okay? It's important to know what it is, because it becomes important later.
So that will be my bass line, and again, I can't change it any time, putting the diminished fifth somewhere else. I know the other notes are a perfect fifth down from the previous one. That makes it sound jazzy, believe it or not, okay?
Then I need to know three magic formulas. The magic formulas in their original formulations are these. First magic formula, it's gonna be minor seventh, seven, major seventh. I'm gonna use these symbols, and those are down a perfect fifth, okay?
So, this is a tool. 5 1 in a major key, if you know what that means. But if you don't know, just think of these as applied to thrift successive notes here, as long as you have a perfect fifth and a perfect fifth of distance.
So you never have the diminished fifth. So for instance I could apply it here and say D is the minor seventh, G is the seventh, C is the major seventh. Okay, this will sound something like that. Okay, D minor seventh, D seventh, C major seventh.
Okay, or I can apply it here to the E minor seventh, E seventh, D major seventh. I can apply it anywhere, except here, because we don't have a diminished fifth interval. Then optionally, and I'm putting the optional part in blue, you can have another minor seventh just before, always a perfect fifth away, or you can have major seventh just up.
But the main formula is those three. So that's magic formula number one. Magic formula number two, it's gonna be minor seventh, plus five, seven possibly altered, minor seventh. That's a 2 5 1 in a minor key.
And again, all those are the distances between all those chords, all those curved arrows means perfect fifths. Okay, so I could have applied it here, like D minor seventh, plus five, G altered, seven altered, C minor seventh.
Okay, or anywhere, I don't have a diminished fifth. Optionally, just after, I can have another another perfect 5th with a minor 7th, or just above, uh, just above then you think I'm right here? Just above, I can actually have a diminished 5th, uh, with a major 7th.
Yeah, some major 7th just here, so these fits the diminished 5th here. That's important because I do, because you see here in the first magic formula we never have a diminished 5th, so we can't fit, possibly fit this, but here we have this.
We have also, so that's a 2-5-1 in minor with two extra chords. Um, we have a third magic formula, again I'm gonna apply this in a second and you'll see how it works. It's very easy. Third magic formula is major 7th, then down a diminished 5th.
7th, down a perfect 5th into either a major 7th or a minor 7th, you have the option. Okay, that's a Neapolitan cadence, Neapolitan chord dominant tonic. Again, you don't need to know what any of that means, these are just three magic formulas.
Now, the idea is that to pick those magic formulas to this line here, and the best place to start is always a diminished 5th, because I have to put, I can put either this or this. In this case, since it's towards the end, I don't want to put all these.
I mean, I could put major 7, minor 7th, flat 5th, and 7th altered, and just ignore the rest of the formula. Or I can put these as long as I respect this diminished 5th. So, let's apply this formula here.
And I'm going to put a major 7 here at the end. Okay, so I'm just applying this formula here to this last three chords. Now, when I apply and I connect to the rest, I would like to always connect them to the first chord, or to the extreme chord.
So, I would like a chord progression that ends with a major 7th chord. So, I could pick those three, minor 7th, 7th, major 7th, or minor 7th, 7th, major 7th, major 7th. I'm going to apply only the black thing here.
So, I have a major 7, which would be this. The 7 becomes this. The minor 7th is this. See? So, I had one formula gave me this. Another formula gave me this. Now, I want to connect on this minor 7th. I have a nice minor 7th here, and I can just put the ones just before.
So, minor 7, 7th, major 7th, minor 7th, or minor 7th, or minor 7th, or minor 7th, or minor 7th. At the end. actually I can't because here I will have a diminished seventh and nothing will work here, so I'll actually have to go.
This G minor seven is this minor seventh here, but this is this. Here I'm going to put another minor seventh, here I'm going to put a seven altered, and I'm going to put a minor seventh, flat five. Yeah, I've done my tenmanship here, but essentially it's E minor seventh, flat five, A altered seven, D minor seven, G minor seven, D7, F major seven, B7, E major seven.
If I restart... It flows beautifully. Is that the only way of doing all this? No, of course. I could have fit the formulas in another way. I could have imagined that this diminished 7 was this diminished 7 here and apply only the part of the formula that fits here.
So I have this major 7, minor 7 flat 5, and this 7 altered. Great. Now I have a major 7 here. This could be this major 7 here, or this could be this major 7 here. It could also be this major 7 here, but then I don't have a diminished 5th to fit here because there are all perfect 5ths of distance, so I can't fit this.
So I'm going to pick this being this, so major 7, major 7, 7, minor 7th, and then I'm going to fit this minor 7th to this minor 7th here, put a 7 altered here, and a minor 7 flat 5. Again, it's an option.
I could have, since that's what we did before, let's do something different. Instead, I'm imagining that this is this, we have another minor 7th, and a 7 altered here. So I will start from an E7 altered.
A minor 7, B minor 7, E7, B major 7, F major 7, B minor 7 flat 5, E7 altered, and I can restart. If I don't like having the same chord, if I want two different chords, fantastic, then in this case, I just fit the D, fit it differently.
this is a minor 7th, this is a 7th altered, and this is a minor 7th flat 5, and so I start with a minor 7th flat 5, E minor 7th flat 5, A7 altered, D minor 7, G7, C major 7, F major 7, D minor 7th flat 5, E7, and then start again.
Okay, and it flows. What if I put the diminished fifth in another position? What if the diminished fifth was, say, here? This would have been a C sharp, it would have been an F sharp, now everything fits differently.
So, I could have fit this formula here to the end. Okay. Let me write it in blue, plus probably more visible, so G, major 7, the diminished fifth, C sharp, minor 7, flat 5, F sharp, 7, altered, B, minor 7, E, minor 7.
I need a major 7 here, which can come from this formula here, and I like to do it this way, major 7, major 7, 7, minor 7. So I'm starting from, so I adjusted this and this formula to fit. I'm starting from E minor 7, A7, D, major 7, G, major 7, C sharp, minor 7, flat 5, see, it works, F sharp, 7, altered, D, minor 7, E, minor 7, and I start again.
So, that's a possibility. Or, I could add, this diminished fifth, I fit it to this thing here, so that's a major 7, that's a 7, here I have the option to make it a major 7 or a minor 7, I can make it a minor 7th, then I can fit this, for progression here, E7 and major 7, I need to connect this major 7th here, and I can use this major 7, major 7, 7, minor 7.
So now I use only this and this. How would that work? Work this way, E minor 7, A7, D, major 7, G, major 7. C sharp 7, F sharp, minor 7, B7, E, major 7, and play it again without me. And it works, it flows, it doesn't matter where you put the diminished 7th, as long as you put 1 diminished 5th, as long as you put 1 diminished 5th somewhere, so the notes, the starting and ending notes, come at the same time.
And you use those three magic formulas, a 2-5-1 in major, a 2-5-1 in minor, and a Neapolitan cadence, and those two are here to accommodate the diminished 5th. As long as you use this, every chord progression you create by fitting those formulas to this line will work and sound and flow perfectly, okay?
You want to know more about all that, I recommend you guys have a look at my course, Complete Chord Mastery. We do this, we do more, we do a lot of other things, okay? We study all the chords on all the guitar fretboard, we see how to remember them, we see how to connect them with each other.
how to create your own chord shape when you need it, how to create different effects from those chords, how to connect those chords together in a chord progression. Then we study how to write chord progression, how to make all these into something that sounds good on guitar.
So how to create an actual guitar part, not just playing block chords all the time, not just going... But creating something that sounds better, more guitaristic, more interesting, okay? And so we studied all these, and then eventually we get up also to chord melodies.
So it's a complete course, it's in the name, Complete Chord Mastery. And I totally recommend you guys check it out. This is Tommaso Zillio for musictheoryforguitar.com, I hope you learned something today, and until next time, enjoy!
Fretboard Note Stickers Are KILLING Your Progress — Do THIS Instead

A student recently asked me: "My guitar has fretboard stickers with all the notes on them. Is that okay for learning the fretboard?"
My answer was simple: take them off. Now. Okay, maybe I softened it a little. But that was the gist.
Here's the thing, {subtag:name|part:first|ucfirst}. Those stickers feel like they're helping. You look down, you see the notes, you feel like you're learning.
But you're not.
It's like trying to build muscle by watching someone lift weights. Sure, you're in the gym. Sure, you're technically "there." But there's no resistance, no effort. Muscles grow through effort
Same for your brain.
Learning the notes requires recalling where they are. That's the exercise. That's what makes you better.
("Pain is weakness leaving the body" say the Marines. "Effort is ignorance leaving the brain" says your music theory teacher...)
When you have stickers doing the recalling for you... there is no exercise. You're just reading labels.
(Also, have you tried removing fretboard stickers? They leave behind this looovely gummy residue that's somehow harder to remove than Excalibur from stone. Ask me how I know...)
I get it. We all want shortcuts. And the internet is full of "hacks" that promise to make learning effortless.
But here's the secret nobody wants to hear: learning the fretboard is not that hard after all. It doesn't require magic. It requires about 5-10 minutes a day for a few weeks doing some simple exercises. That's it.
I explain exactly why stickers don't work — and what actually does — in the video below.
P.S. If you want the exercises I mentioned, I have a free ebook on how to learn the notes on the fretboard: https://www.musictheoryforguitar.com/guitar-notes.html. No stickers required. No sticky residue either!
Video Transcription
Hello internet, so nice to see you! I got a question on how to learn the notes on the guitar fretboard. My guitar fretboard has stickers. Is that okay for this or do I take them off? If your guitar has fretboard stickers, meaning you have the notes written down on your fretboard, take them off now.
Now, I know this is a sincere question. It's a genuine question. And so I want to answer you genuinely as a teacher to a student. Take them off. It's not helping you to have those stickers on your fretboard.
It's giving you the illusion of helping you because it seems easier now, but it's not making you faster at finding those notes. The only thing that's making you faster is actually learning where the notes are.
Which again, I know it sounds complex at first, but it's not. And if you've seen my video on how to learn the notes on the fretboard, or downloaded the free ebook I have on how to learn the notes on the fretboard, it's a free ebook, okay?
With videos I'm showing you how I'm doing it, okay? You know that it's not that hard. You just need to practice a few exercises for a while. You just know the notes on your fretboard. Simple as that.
It's not a hard thing. Don't go around YouTube finding 60 different methods, like of geometrical methods on how to triangulate on your guitar. It's a simple matter of doing a few exercises until you know your notes.
It's really not transcendental, it's not mystical, it's not complicated, it's simple practice of a few exercises. Why the fretboard sticker don't work? Because the exercises that you do to learn the notes on the fretboard consist in, for instance, playing the same note on all the six strings and finding those notes.
If the exercise is finding those notes, you can have a fretboard diagram with you at first and then you first do it by looking at a diagram or having the sticker, sure, but a diagram it's easier because you can take the diagram away.
You can take the piece of paper away and then try to do it without and see if you remember those notes. You cannot take the stickers away and then put them back in and then take them away and then put them back in.
Okay? But the exercise consists exactly in recalling the position of the note. If you have the fretboard stickers, you never get to do that thing. You never get to do the recalling because you keep reading those.
So you are not doing the exercise. It's just lifting weights without actually having weights in your hands. Okay, you are just doing the motion, but there is no exercise in there. There is no effort, there is no resistance, so you're not getting stronger.
This is the same. What I see in online lately, especially in these last couple of years, that everybody is searching for a way to make things easier, which is good. We don't want to make things more complicated than they are.
But then they go completely overboard, overshoot their target, and they find a way to make it so simple that there is no effort, no exercise, and so they are not getting better. It is important that when you make things simpler, you make it in a way that allows you to improve at your instrument or musically.
If you make it so easy that there is zero effort, that there is zero difficulty, zero resistance, you are not getting better. And so it's just a crutch. You're just playing stunted and you're never going to become better at the instrument.
Learning requires some resistance. Just like lifting weights requires some resistance, just like learning a new language requires some effort to memorize the language, just like learning anything requires some effort in it.
It doesn't mean it's unpleasant, it doesn't mean it's bad, but you need to engage with the thing and to actually get better. And I know the person who asked this question was not trying to make things too easy.
It was a genuine question, and some answered genuinely, take those stickers off. Okay? There's no shame in using those at first, okay? But take them off. Because while you have them on your guitar, you are not getting better.
Do not go around and find shortcuts for everything. Find somebody who can teach you. Could be me, could be somebody else. Do not accept shortcuts that make things too easy and so there is no effort and no learning.
The good shortcuts makes it easier to learn and you get better and eventually you can forget the shortcut because you learned the real thing and so you don't need the shortcut anymore. Okay? The good shortcuts, I like that.
I like bridges. You cross the bridge. Without the bridge, you will have to cross the river and that's hard. The shortcut, it's a bridge over that river. You cross the river. Once you've crossed the river, you don't take the bridge with you.
The shortcut stays there. You don't need to have the stickers on your guitar. You learn where the notes are and then you just know. And again, that's not as hard as it looks. It just requires doing some exercise.
And again, I have a free book about that. You find the link in the description or it appears in the video. Okay, just click on that. It's free. Download it, read it, see the video, do the exercise for five minutes a day for a few weeks, and you will learn the notes on the fretboard and you will not need to have stickers on your guitar.
This is Tommaso Zillio for musictheoryforguitar.com and until next time, enjoy!
How Do You Transcribe A Guitar Part You Can BARELY HEAR?
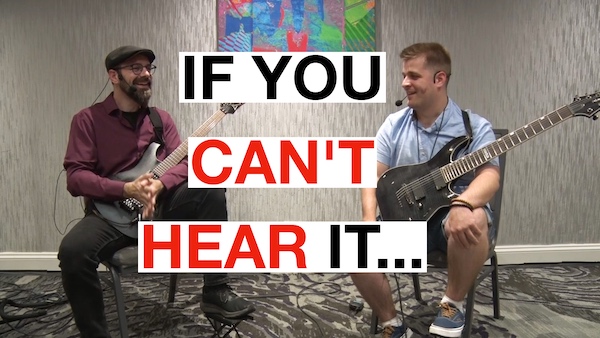
Imagine you're transcribing a song by ear. The chords? Got 'em. The melody? Easy. But then there's that guitar part — the one buried so deep in the mix you can barely tell it exists.
You squint at your speakers. You crank up the volume. You convince yourself you heard something... maybe?
At this point you have two options:
- Find a tab online and hope whoever made it has superhuman ears
Give up and become a drummer insteadLearn what the pros actually do in this situation
Here's the thing. That person who made the tab you're thinking of downloading? They listened to the exact same recording you're listening to. They couldn't hear that buried guitar part either.
And yet... they wrote out a tab anyway.
So what's their secret? Unbounded misplaced confidence They know how to transcribe with limited information. And honestly, once you know the trick, it's not that complicated.
(Quick story: I once had to transcribe the Game of Thrones theme for a guitar ensemble. Toward the end, they put in all these mechanical city sounds over the music, and you literally cannot hear the arpeggio part. So what did I do? I made it up! I knew the chords, I knew the style, I interpolated. Nobody ever noticed.)
The real skill isn't "hearing everything perfectly" — it's knowing when to work with what you have and when to... let's say, creatively fill in the gaps.
In the video below, I explain exactly how to handle this to a student who had this very question.
P.S. Hey, even some famous bands can't play their own songs exactly as recorded anymore because they forgot what the buried parts were. If they can't remember, you're allowed to improvise too.
P.P.S. One of the most important aspects of learning music by ear is actually having a properly developed vocabulary of musical building blocks, particularly chords and harmony. If you fully develop your vocabulary of chords, then you will be more likely to recognize those sounds in music and therefore know how to transcribe them. If you want to massively improve your knowledge and vocabulary of chords and harmony on the guitar, check out my Complete Chord Mastery guitar course
Video Transcription
Hello Internet, so nice to see you! Ear training is an important part of being a good musician and so a good guitar player. But ear training has some limits, okay? There are things we can and cannot do with ear training.
And today I want to address one of them because a student asked me, what do we do when we want to transcribe a song, but the guitar part is buried in the mix and it's barely, you can barely hear it. You can hear some, but you cannot hear all of it.
Okay. How do we transcribe that? What kind of tricks? What kind of systems? What kind of ideas we can have to transcribe something that we cannot hear clearly? Well, let's go and see. So I have a question about how to figure out songs by ear when sometimes the guitar part is buried by other parts of the song.
So like if the singer is singing over it or something else, I have to really listen to try and figure it out. If it was on its own, I might be able to do it. Yes. But it's very difficult when it's buried.
So I can find ways around that. Yes, it is. So you have essentially two solutions here. Solution number one is that if that guitar part is played somewhere else, then you just go somewhere else to transcribe it.
So if it's the same, if it's the second chord, but you can hear the first chord, vice versa, okay? You just piece together a guitar part from where you can listen to it. That would be the first thing.
So you're cheating. You're not transcribing the guitar part, you're transcribing the guitar part somewhere else. It's the same guitar part. I mean, hopefully. But the second solution is this. If you, who are a musician, who really cares about doing things precisely, because I know you, okay, can't hear the guitar part, is that guitar part that important?
If you play some other notes and it still fills it up, is that important? Not desperately. Not desperately. I like that. Not desperately. Exactly. Exactly. What we do is we try to make a difference sonically.
If you try to play a part and you sincerely go like, I don't hear a difference between my part and their part, and when it's buried in the mix, it will sound the same. You're done. You're done. You don't have to play exactly the same thing because nobody can hear that.
Once I was transcribing the theme of Game of Thrones for guitars, because we wanted to do an ensemble performance with a few guitars, center, etc. And toward the end there is this nice figuration part.
Okay, because they reprise the theme, but goes to different chords. And since they put in all the noises of all the mechanism of the cities moving around, you cannot hear the two parts of the thing. So I just wrote it.
What do you do? There's clearly something. You can attack all the strings. You know the chords because you transcribed the chords previously. You know the figuration and pretty much interpolate the thing and if there's something different nobody can hear it.
You just need to patch it up so that in your rendition it sounds good. Okay? Nobody will ever ever complain. That's one story. There's plenty of other stories like that. There are bands that made album with so many harmonies, Blank Guardian, okay in case you're wondering, that now they cannot even play the original version because they don't remember all the original parts and they can't transcribe because there are too many parts in harmony and like I don't know what I'm doing here and I can't hear it and we don't have the original tapes or something.
So if they can't, why would you? My point is that you put your energy where you can hear a difference. When you cannot hear a difference, you just make it up. Simple. It's not cheating. Or if it's cheating, we cheat.
Fine. Not a problem. You do what you can with what you have. That's the idea. More or less. As long as the final rendition sounds decent, good. And if it doesn't sound decent, that's maybe why they buried the guitar part.
Because it wasn't sounding good. I mean, there could be a number of things. Okay? Yeah. So, make it up. That's the idea. Do your best and then make it up. Okay, that's it.